Crooked Arms Cheats Guide for Arena Breakout: Infinity
Preparation
DISABLE or REMOVE MANDATORY
- Disable antivirus(Remove!)
Additionally
- Remove FaceIt and Vanguard
- FaceIt this is anti-cheat CS:GOVanguard this is anti-cheat Valorant
Additionally (if an error occurs)
- Enable VT-x, SVM in BIOS
- Restart your system and try again Hyper-V
- Please, change boot mode to UEFI in BIOS
Download the Latest Version
- Download the launcher and put it on a flash drive!
- Launch Launcher (from a flash drive!)
- Register in Launcher
- Activate key

You need to register a new account in the loader.
Requirements:
- Password must be at least 6 characters long.
- Email with .rus domain is not supported.
- 3 failed login attempts = IP ban for 15 minutes.
Launch Instructions
IMPORTANT:
ignoring these actions will lead to a ban!!!
Before starting the cheat, close the Game and the game launcher!
If you have previously run any cheats, restart your PC! (restart pc before using another cheat)
Close the software launcher before launching the game!
If you neglect one of the actions, you can get banned!
Running the software, you need a flash drive (virtual or physical)
Launcher Arena Breakout: Infinite:
1. Launch the Launcher (from a flash drive!).
2. Select software Arena Breakout: Infinite and click Launch.
3. In case of successful completion, the successfully launched message and the Launched button will appear.

Close Launcher
disconnect the flash drive (make sure it is disconnected!)
- Start the game
- The cheat menu opens with the "HOME" key
- Note: Run the game in a window (if necessary, change the resolution of the game window to a smaller one so that the window borders are visible
- Enjoy your game.
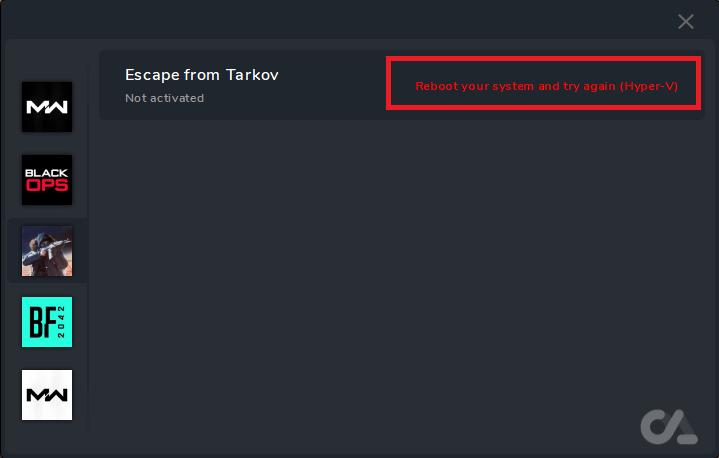
SOLVING ERRORS WITH HYPER-V
This error means that you need to disable Hyper-V on your PC
Follow these steps:
Disable Hyper-V and restart your PC.(You can use the provided disable_hyper-v.ps1 file or disable it manually.)
Download the file disable_hyper-v.ps1 to your PC. Right-click on the Start button → select Windows PowerShell (Administrator). Restart your computer. Done — Hyper-V will be disabled.
Disable "Core Isolation" / “Memory Integrity”:
- Start → Settings → Windows Security → Device Security→ Core Isolation → Turn Off
Uninstall any antivirus and security software. After uninstalling, restart your computer (make sure to remove any remaining files or leftovers from the antivirus).
How to Disable Hyper-V in Windows Features
1. Use the Run Command Dialog Box
- Press Win + R to launch the Run command dialog box.
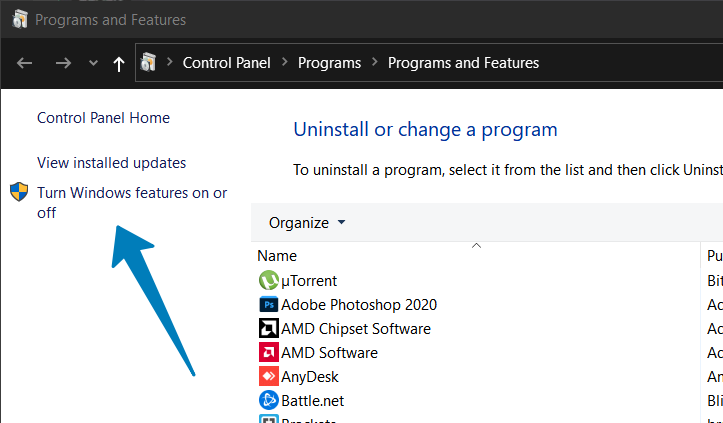
- Type appwiz.cpl and click OK to open the Programs and Features tool.
- In the left panel, click on Turn Windows features on or off.
2. Use the Windows Search Bar
- Press Win + S keys at the same time to launch the search box.
- Type Windows Features in the search box to find that applet.
- Click Turn Windows features on or off to open the window in the screenshot directly below.

1. In the Windows Features dialog, locate Hyper-V.
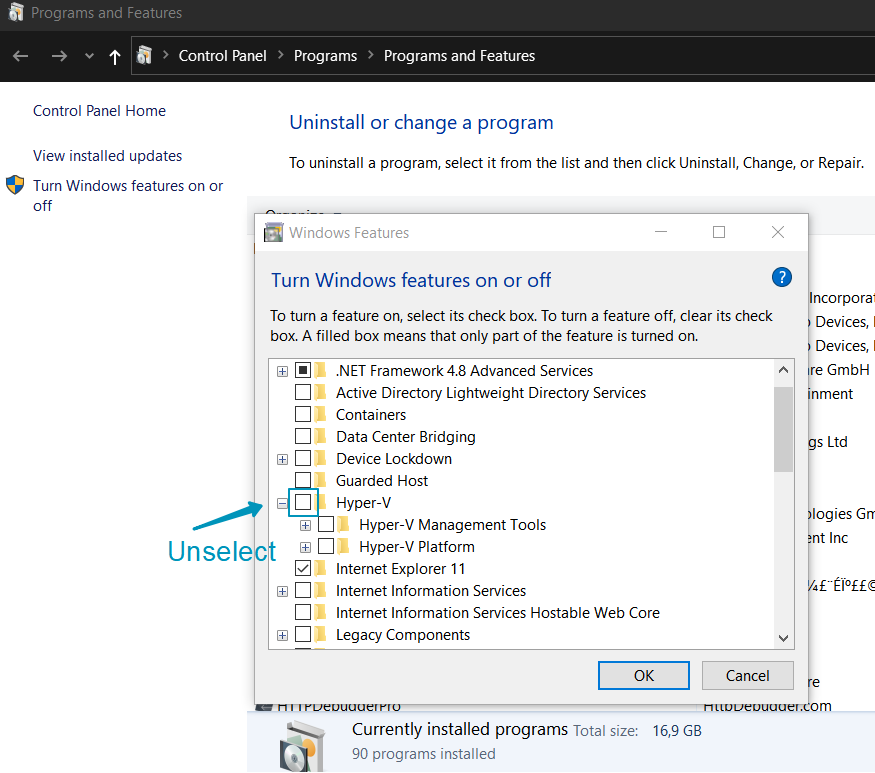
2. Uncheck the Hyper-V option to disable the feature.
3. Next, scroll down and locate the Virtual Machine Platform and Windows Hypervisor Platform options.
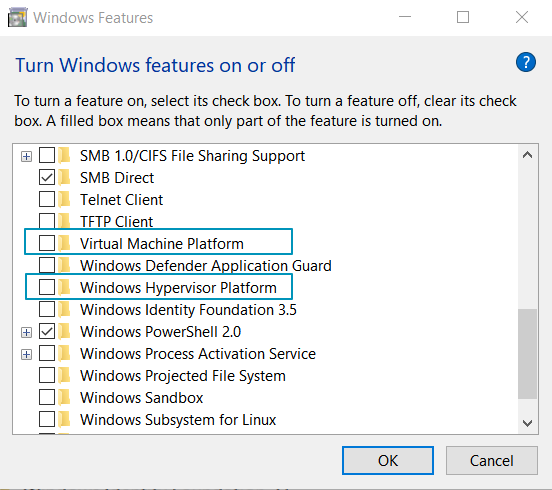
4. Unselect both options and click OK.
5. Windows will uninstall Hyper-V and other features from your system.
6. Once done, restart your PC to apply the changes.
How to Disable Hyper-V Using the Command Prompt

If the Windows Features dialog fails to remove Hyper-V, you can use the Command Prompt to disable the hypervisor. Here's how to do it.
To access the Command Prompt through the Run dialog, follow the steps below:
- Press Win + X to open the Run dialog box.
- Type in ‘cmd’ in the dialog box and hit OK.
- In the Command Prompt window, type the following command and press Enter: dism /online /disable-feature /featurename:Microsoft-hyper-v-all
- Upon execution, the DISM tool will disable Hyper-V and show the operation completed successfully message to indicate successful execution.
- Type exit to close the Command Prompt and restart your PC.
If the error still occurs on the our Launcher, open the Windows Features dialog, disable the Virtual Machine Platform and Windows Hypervisor Platform options and restart your PC.
How to Disable Hyper-V Using PowerShell

If you prefer PowerShell, you can use the WindowsOptionalFeature cmdlet to disable Hyper-V. To do this, you need to launch PowerShell with admin privileges and execute the command.
To open PowerShell using the Run Command dialog box, here’s what you can do:
- Press Win + R to open the Run command dialog box.
- Type PowerShell and then click OK.
- Press Ctrl + Shift + Enter to open either the Command Prompt or PowerShell with administrator privileges.
- In the PowerShell window, copy and paste the command below and press Enter: Disable-WindowsOptionalFeature -Online -FeatureName Microsoft-Hyper-V-All
- Wait for the process to complete. Once done, close PowerShell and restart your PC to apply the changes.
How to Turn Off Virtualization-Based Security (Memory Integrity)
If you encounter the Hyper-V detected issue even after you disable Hyper-V, try to disable the Memory integrity feature in Windows Security.
The Memory integrity feature is part of Core Isolation. It helps prevent threat actors from accessing and infecting high-security processes using malicious code.
By default, Windows disables the Memory integrity feature to avoid conflict with apps and device drivers due to incompatibility issues. This can also cause issues with third-party virtualization tools and programs that need to access your system's virtualization hardware.
To turn off Memory integrity in Windows Security:
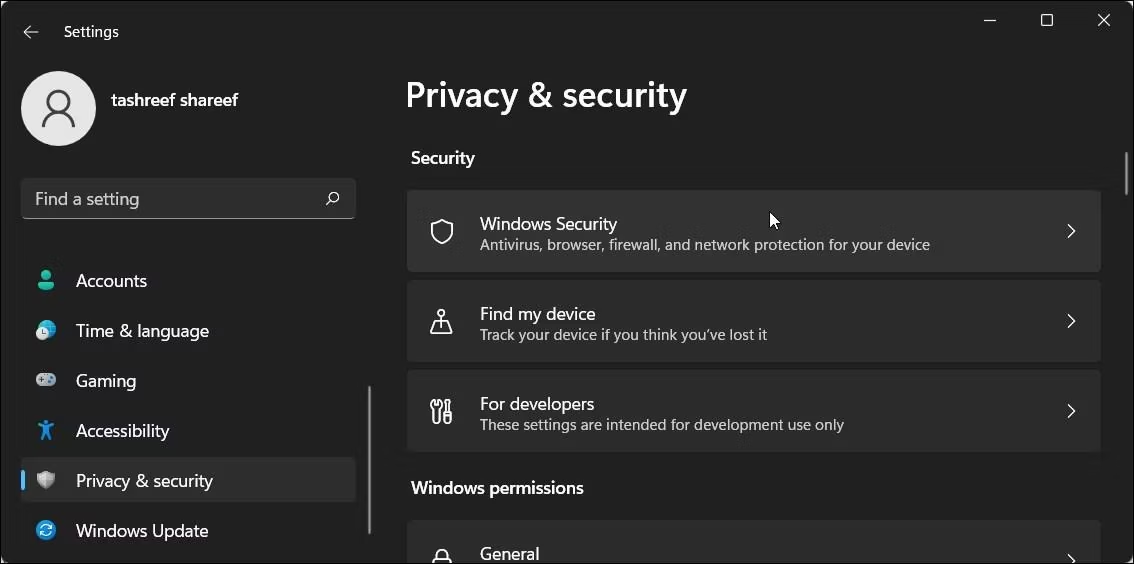
1. Press Win + I to open the Settings app.
2. In the left panel, click on the Privacy & security tab or click Update & Security if you on Windows 10.
Windows 11

Windows 10
3. Next, click on Windows Security.
4. Under the Protection areas section, click on Device security

Windows 10
5. Next, click on Core isolation details under the Core isolation section.
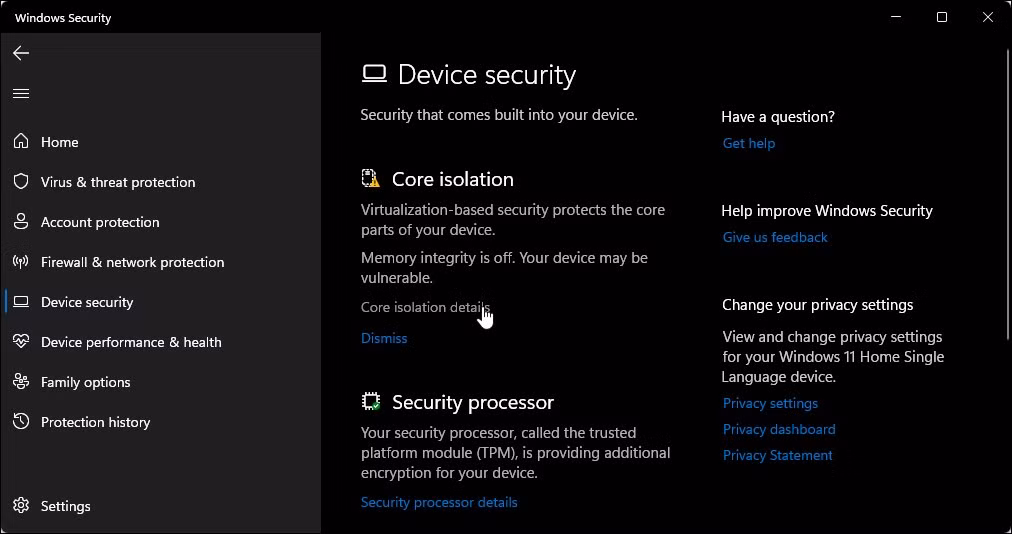
6. Toggle the switch under Memory integrity to turn it Off.

7. Restart your PC to apply the changes.