
Let's start by understanding what Secure Boot is: it is a UEFI security feature that prevents unauthorized operating systems and bootloaders from running. Disabling Secure Boot is often necessary to install alternative operating systems (such as Linux) or to run certain diagnostic programs. The process of disabling it varies slightly depending on the motherboard manufacturer. Below are step-by-step instructions for popular brands.
The general procedure is as follows:
- Restart your computer and enter the BIOS/UEFI. Usually, this is done by pressing Delete, F2, F10, Esc, or another key shown on the startup screen or in the motherboard manual..
- Find the section related to boot or security: “Boot,” “Security,” “Authentication,” or “Advanced.”.
- Locate the Secure Boot option and set it to Disabled or select the OS type as “Other OS.”.
- Save changes (usually by pressing F10) and restart your computer..
Here is the exact procedure for some specific motherboards:
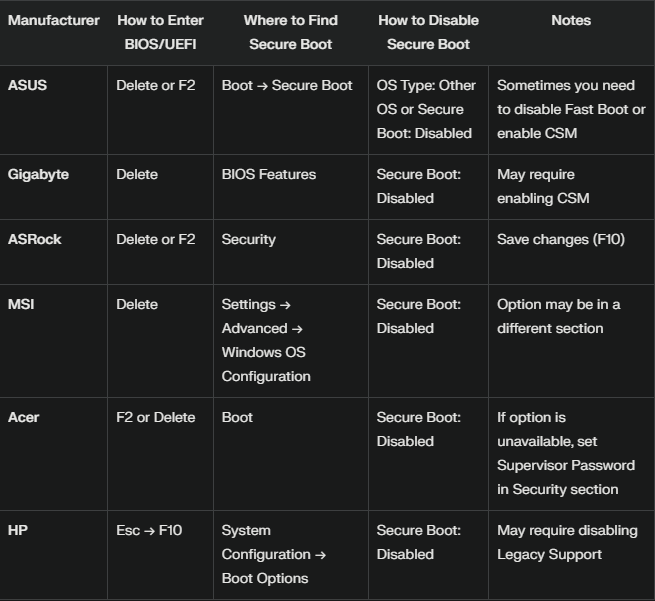
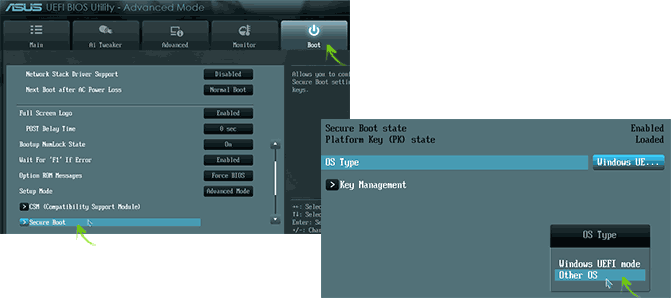
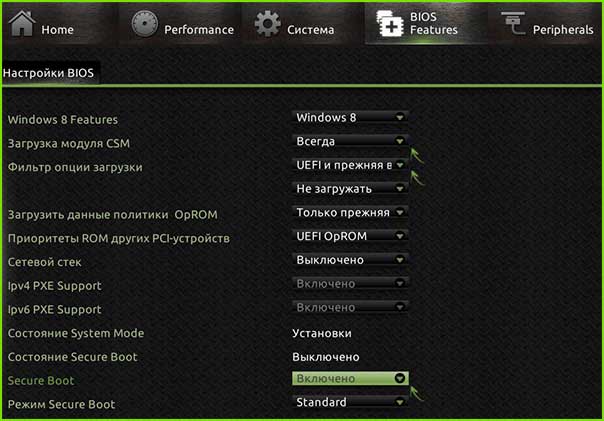
Here's what some BIOSs look like on different motherboards:
ASUS:
ACER:

GIGABYTE:
Here are some nuances that may prevent disabling Secure Boot:
- On some motherboards, the Secure Boot option may be unavailable for modification until an administrator password (Supervisor Password) is set. After setting the password, the option becomes accessible, and then the password can be removed.
- Sometimes, disabling Secure Boot also requires enabling the Compatibility Support Module (CSM) to allow booting older operating systems..
IMPORTANTLY! After disabling Secure Boot, remember to save your changes and restart your computer.
If you do not find the setting you need, please refer to your motherboard's user manual or the manufacturer's official website. You can also contact the support of the site, and you can find out how to do this correctly at the link Blog | How do I contact technical support GetCheats.io?