Make sure to follow all instructions and do not skip any step. Every step in this guide is important.
Do not skip any step. The spoof is done only once — a repeated attempt will reset everything, and you will be banned again.
Step 1 — Windows Reinstallation
Download Windows 10 or Windows 11 from the official Microsoft website
Completely delete and format all drives, then recreate the partitions
Make sure that TPM, fTPM and all similar features are disabled in BIOS.
The reinstallation is performed from a USB drive. Don't forget to go to the "Disk" section and prepare the drive before installing Windows.
Open the command prompt in the Windows installer by pressing Shift + F10 and run the commands:
diskpart
list disk
select disk X   (replace X with your disk number)
clean
After completion, proceed to the next step.
Step 2 — BIOS Reflash
Make sure you do not have anti-cheats installed: Vanguard, EAC, BE, Ricochet.
We recommend flashing one of the older BIOS versions available for your motherboard. We handle this professionally, and nothing can go wrong in the process.
Video instructions by manufacturer:
ASROCK: https://youtu.be/dUCWRqOdLUw
GIGABYTE: https://youtu.be/DIIde3s02kM
LENOVO: https://youtu.be/AwOax1uWgYc
Open System Information (Win + R → msinfo32) and make sure the BIOS version and date have changed.
Step 3 — RAID 0
🔵 For Intel processors
Entering BIOS/UEFI
Immediately after turning on the computer, press the Delete key (or F2).
Enabling the RAID controller
Go to the Advanced section.
Find SATA Mode Selection and change the value from AHCI to Intel RST Premium (or simply RAID).
If you are using NVMe SSDs in M.2 slots — enable the RST Controlled option.
Press F10 to save and reboot.
Creating a RAID 0 array
Enter BIOS again → Intel(R) Rapid Storage Technology → Create RAID Volume.
Select RAID0 (Stripe), check the required drives and click Create Volume.
When installing Windows on a RAID array, you will need to load the Intel RST driver from a USB drive during system installation.
🔴 For AMD processors
Entering BIOS
Press Delete or F2 while the computer is booting.
Enabling RAID mode
Go to Advanced → SATA Configuration.
Change SATA Mode from AHCI to RAID.
If you are using NVMe drives — enable NVMe RAID mode.
Save changes (F10) and reboot.
Creating an array via RAIDXpert2
Enter BIOS → RAIDXpert2 Configuration Utility → Array Management → Create Array.
Select RAID0, enable the required drives (Enabled), click Apply Changes, then Create Array.
When installing Windows on an AMD RAID array, load drivers strictly in order: rcbottom → rcraid → rccfg.
Step 4 — BIOS Configuration
Disabling TPM
Video instructions (INTEL 00:00 / AMD — see timecode):
ASUS: streamable.com/sicp16 — Intel 00:00 | AMD 01:20
MSI: streamable.com/n7q3dk — Intel 00:00 | AMD 01:05
Asrock: streamable.com/ec8u3s — Intel 00:00 | AMD 01:35
Gigabyte: streamable.com/1qhn35 — Intel 00:00 | AMD 01:50
Disabling Secure Boot
After configuring BIOS you may install drivers and basic software (NVIDIA Geforce Experience, Discord, etc.).
Do not under any circumstances install Valorant or other games with anti-cheats until the spoofing is complete!
Important Notes
Do not download games before spoofing (Valorant, Rust, etc.)
TPM and Secure Boot must be disabled in BIOS
Official Windows 10/11 must be installed
BIOS must be updated or rolled back
Step 5 — Running Portal Spoofer 🔧
Part one
Go to the PORTAL SPOOF → ONE STEPS FOLDER and transfer all its contents to the USB drive.
Boot into BIOS.
Disable the protection (on ASUS and similar motherboards) — the Flash Write Protect parameter (name may vary).
Save the settings and restart BIOS.
Boot from the USB drive.
Wait for the startup.nsh process to complete (a notification will appear).
Restart the computer.
Part two
Return to the PORTAL SPOOF folder.
Go to TWO STEPS and repeat ALL actions from part one.
After booting into the system, make sure TPM 2.0 and Secure Boot are disabled.
Go to the PORTAL UEFI → ONE STEPS FOLDER, press Enter many times until the program closes.
Part three
If you are spoofing Valorant, Delta Force or ABI — contact support. They require a full spoof and mandatory TPM bypass — without it you will not be able to play and the ban will come back.
Part four — Changing IP address
Install the TMACv6.0.7 application and follow these steps:
Open the program and click "Yes".
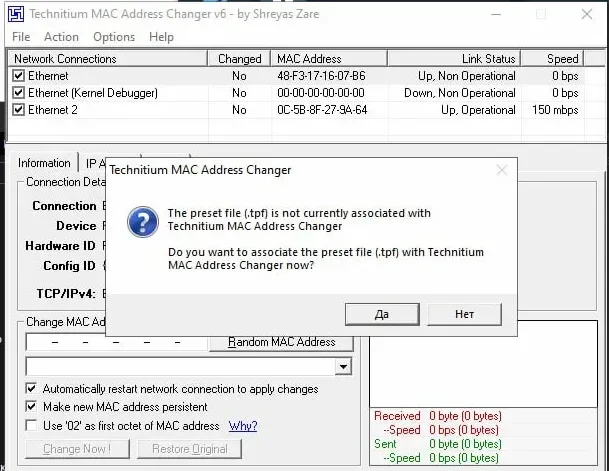
Select "Ethernet"
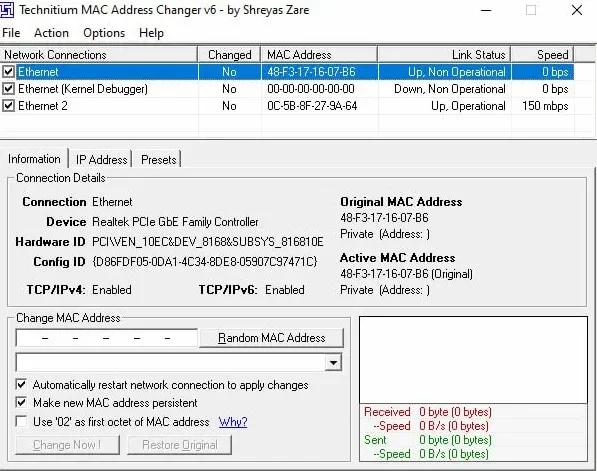
Click "Random MAC Address".
Click "Change Now!".
Repeat the same steps for "Ethernet 2".
Disable WiFi and Bluetooth modules
Make sure the IP address has been changed
Spoof completed successfully — restart your computer and play!
⚠️ Important!
The spoof is done only once. A separate build is created for each client. If you attempt to spoof again — the entire spoof will be reset, and you will be banned again.
If the MAC addresses have not changed — first (if applicable) disable the Bluetooth and Wi-Fi module via Device Manager, then change the MAC address using T-MAC Changer (contact technical support for details).
TPM and Secure Boot are disabled in BIOS
Official Windows 10/11 is installed
BIOS is updated or rolled back
WiFi and Bluetooth modules are disabled
IP address has been changed
TPM Spoofer — ISO and System Preparation 🛡
To get the key for TPM spoof, contact support on the website.
TPM spoofer is not required for all games — check with the administration.
Step 1 — Downloading Ventoy
Go to the official Ventoy website, download the Windows version and extract the archive to a convenient location.
Step 2 — Installing Ventoy on a USB drive
Connect the USB drive (8 GB or more is recommended).
Run Ventoy2Disk.exe as administrator.
In the Device field, select your USB drive.
Click Install and wait for completion.
During Ventoy installation the USB drive will be formatted — all data will be erased. After completion the drive will be ready to work with images.
Step 3 — How Ventoy works
Ventoy does not require writing an image through third-party software:
you simply copy the required files to the USB drive,
Ventoy automatically detects them at boot,
no additional configuration is required.
Step 4 — Downloading the TPM Spoofer image
Download the image that matches your processor:
AMD: Google Drive (AMD)
Intel: Google Drive (Intel)
Wait for the file to fully download.
Step 5 — Transferring the image to the USB drive
Open the USB drive with Ventoy installed.
Simply move or copy the downloaded image to the USB drive.
No additional steps are required.
Ventoy will automatically prepare the file for use.
Preparing TPM before launching the image
At this stage, a preliminary check and TPM cleanup is performed. This is necessary for the correct launch and further work with the image.
The USB drive with the image must already be connected to the computer
Step 1. Checking the current TPM hash
Open PowerShell as administrator.
Run the command:
Get-TpmEndorsementKeyInfo -HashAlgorithm Sha256In the command output, find the PublicKeyHash (SHA256) parameter.
Open Notepad and paste the obtained hash.
Save the file.
This hash will be needed later for comparison and change tracking.
Step 2. Clearing TPM
Press Win + R and type:
tpm.mscand press Enter.
In the window that opens, select Clear TPM.
Confirm the cleanup.
After confirmation, the system will prompt you to restart the computer — agree.
Step 3. Entering BIOS
After the restart begins, do not disconnect the USB drive with the image.
When the computer turns off and starts back up — press the BIOS entry key several times (most commonly: F2, F11, F12, DEL or ESC — depends on the manufacturer).
Once in BIOS — disable Secure Boot. After the spoof is fully complete you may restore it to its original state, but it must be disabled during the spoof.
Let the system boot, repeat the Clear TPM procedure via tpm.msc, then try again.
Step 4. Selecting boot from USB drive
While in BIOS — go to the Boot / Boot Options section.
Set the USB drive with the image as the first boot device.
Save changes and exit BIOS (usually F10 → Yes).
After this, the system will automatically start booting from the USB drive.
TPM Spoof — Step-by-step launch
Step 1. Ventoy screen
After booting from the USB drive you will see the Ventoy screen.
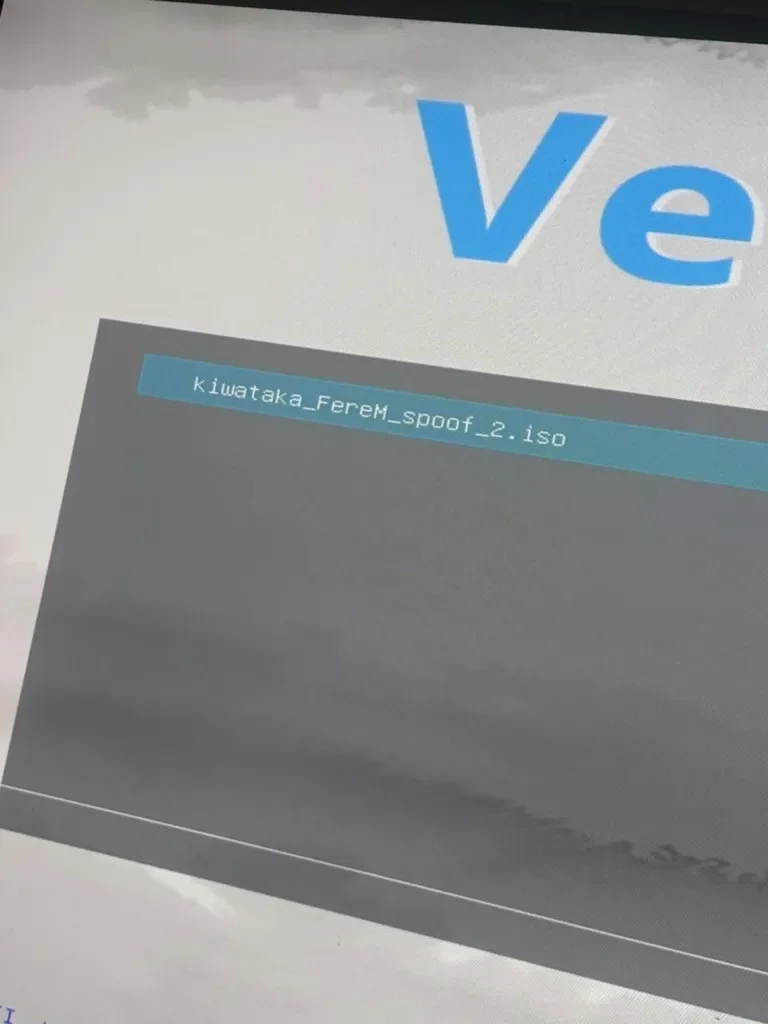
Make sure the required image is selected
Press Enter
Step 2. Selecting the Ventoy boot mode
The next screen will show a boot mode menu.
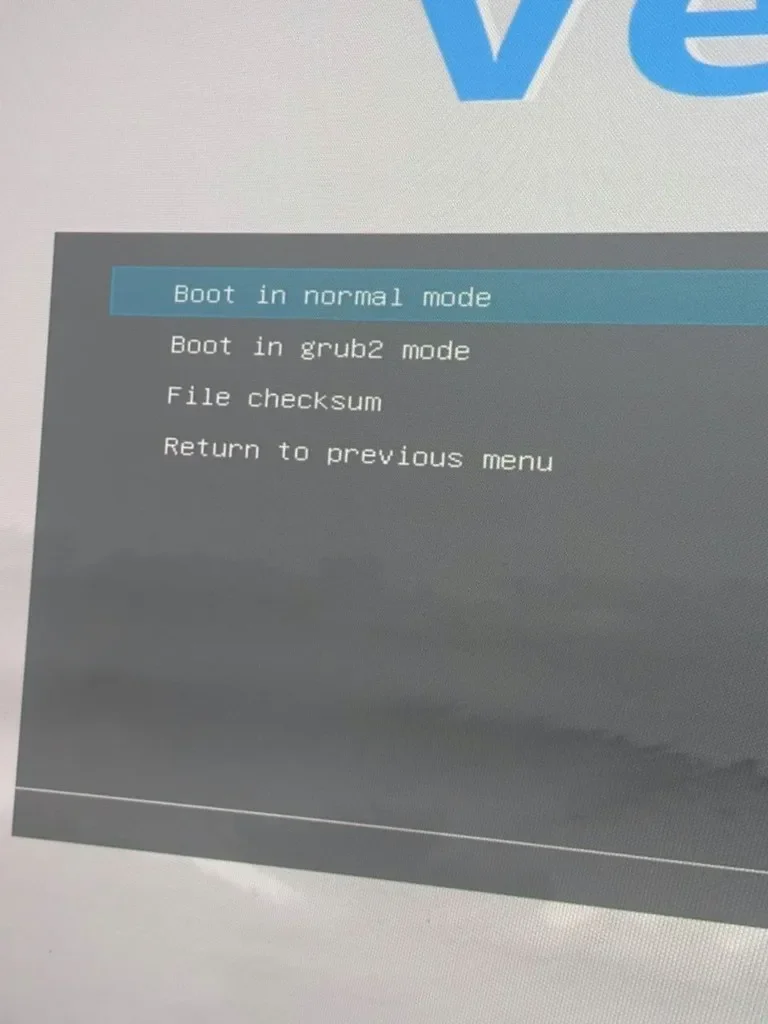
Select Boot in normal mode
Press Enter
Step 3. Selecting the system mode
After a short loading period a screen with launch options will appear.
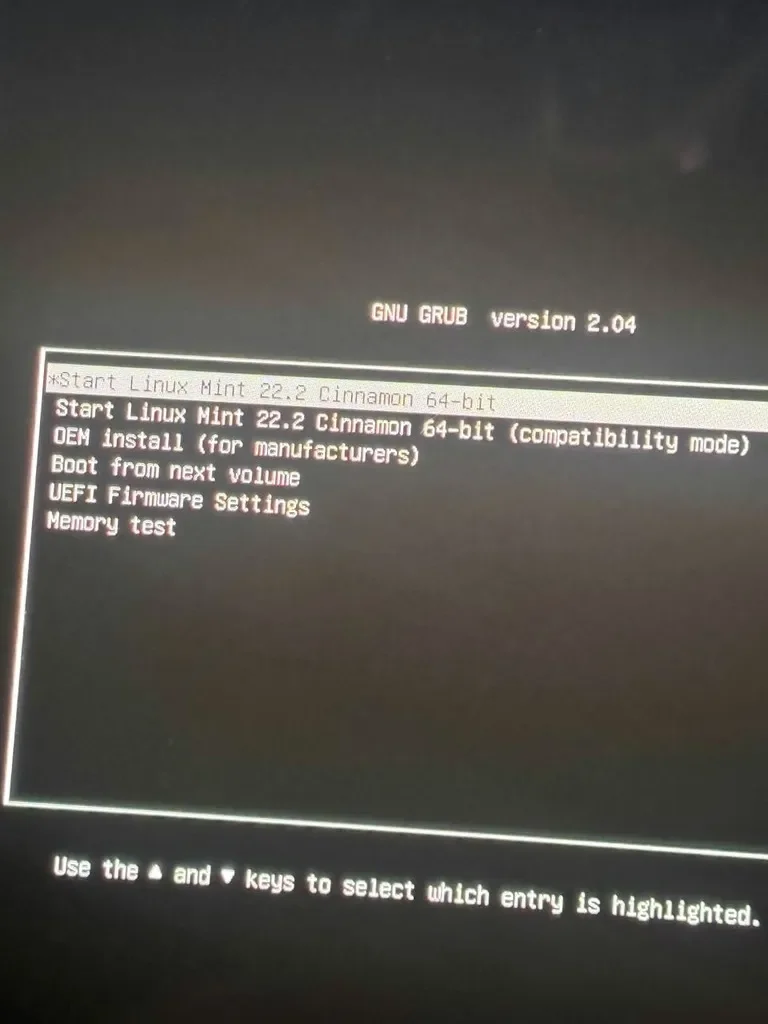
Make sure to select Compatibility mode
Press Enter
Using a different mode may cause incorrect operation.
Step 4. Loading the environment
The system will begin loading.
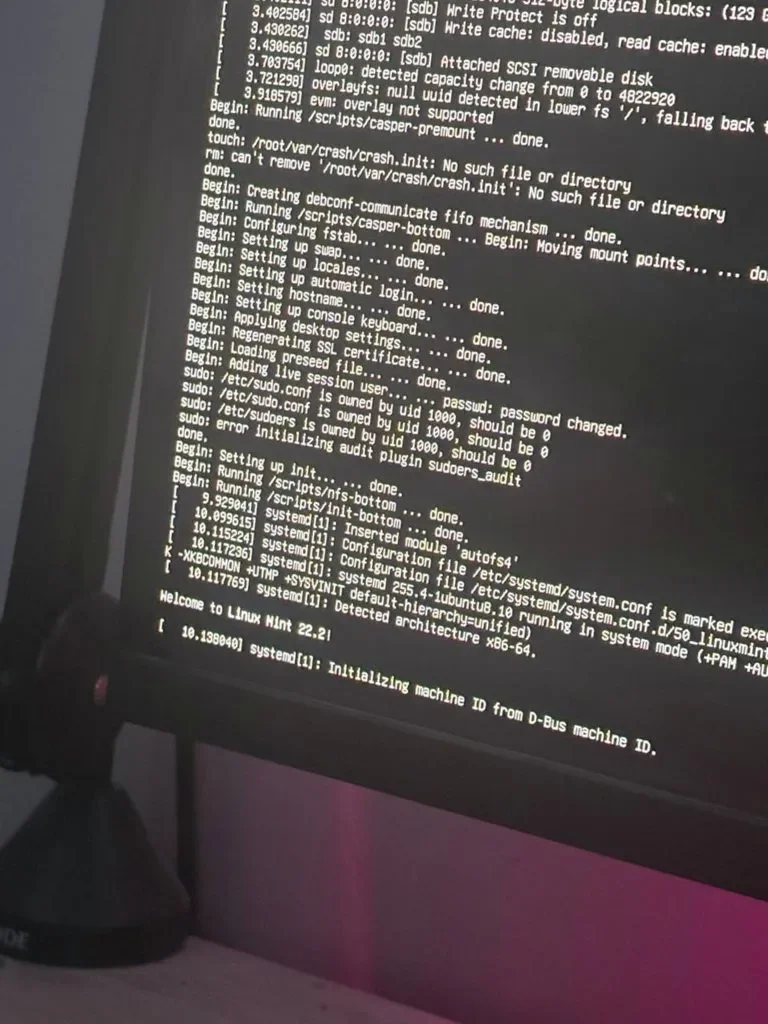
Do not press anything
Wait for the loading to complete fully
Step 5. No network screen
A message about no network will appear.
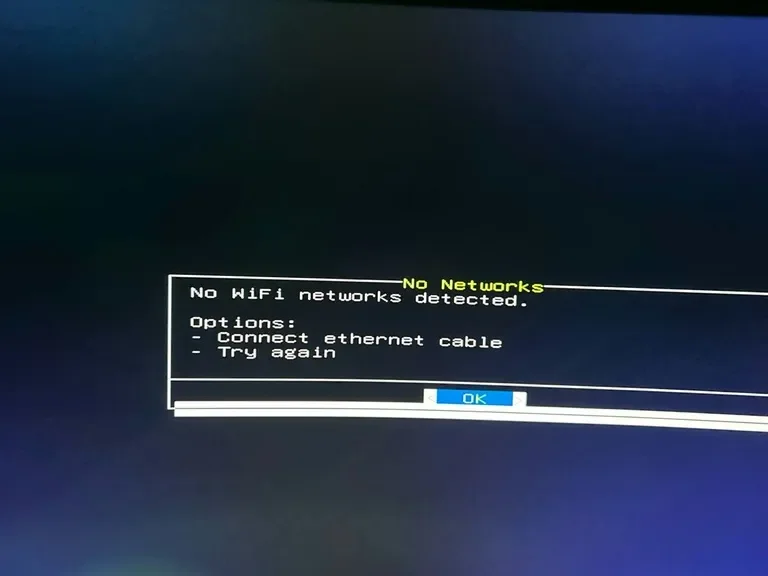
This is normal behavior.
Press OK (Enter)
Step 6. Retry / Scan again
You will be taken to the Retry – Scan again menu.
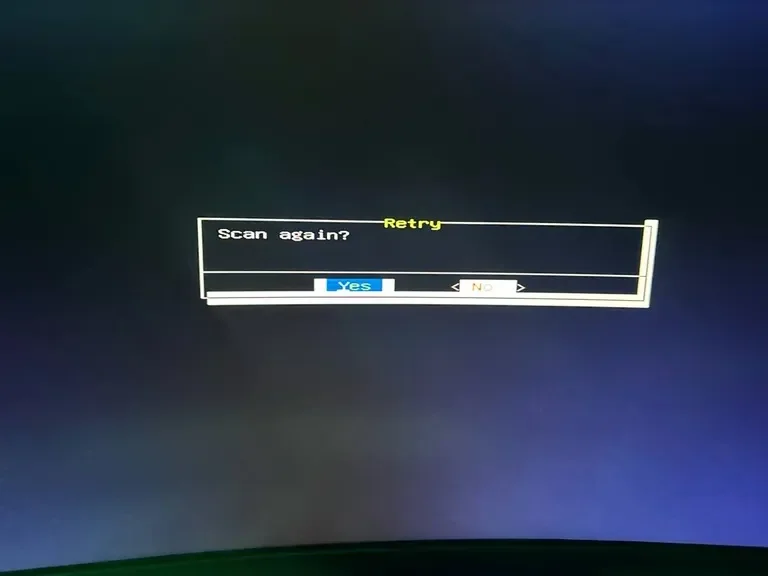
Select Yes
Press Enter
Disconnect the internet (cable / Wi-Fi), then reconnect and select Yes again. After this the system will proceed to the next stage.
Step 7. Entering the license key
An authentication screen will appear.
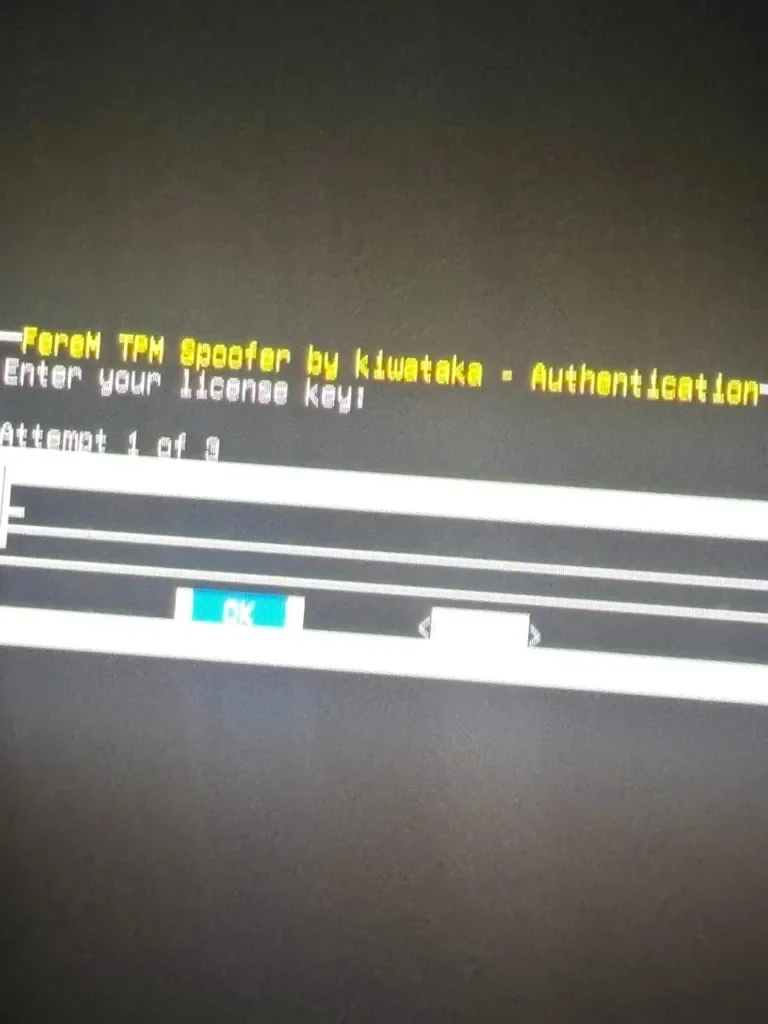
Enter the license key you purchased
Select OK
Press Enter
Step 8. License initialization
A license initialization window will open.
Select OK
Press Enter
After this, package loading and configuration will begin.
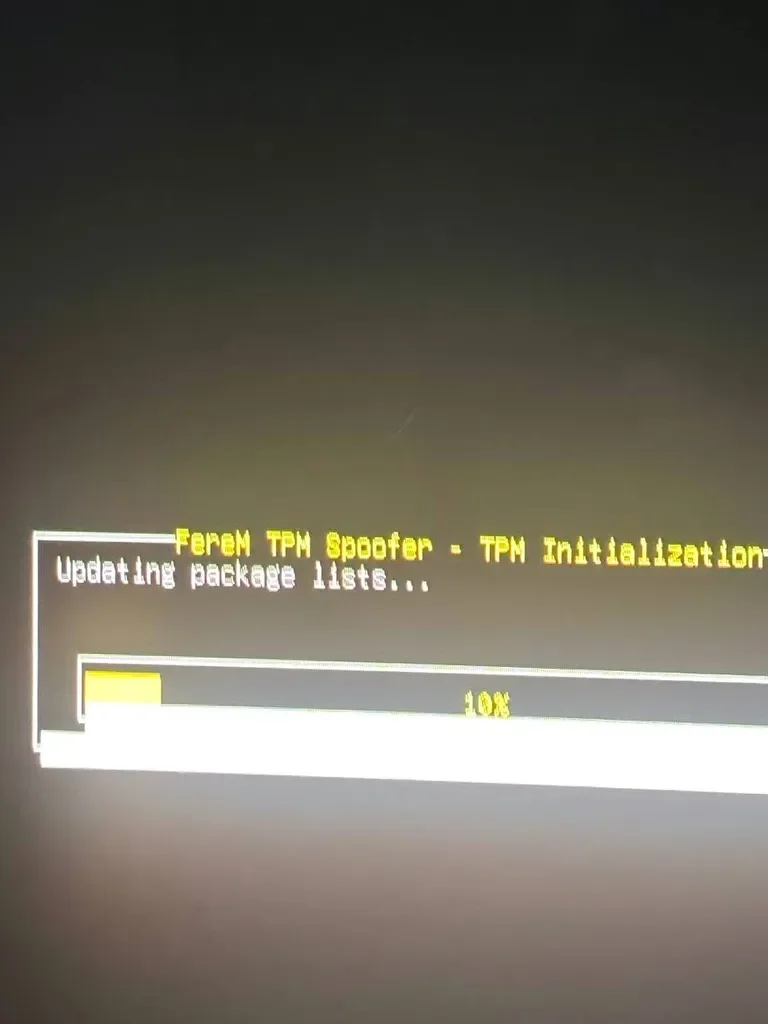
Step 9. Operation complete
Wait for the process to finish. You will see the message TPM Setup Successful.
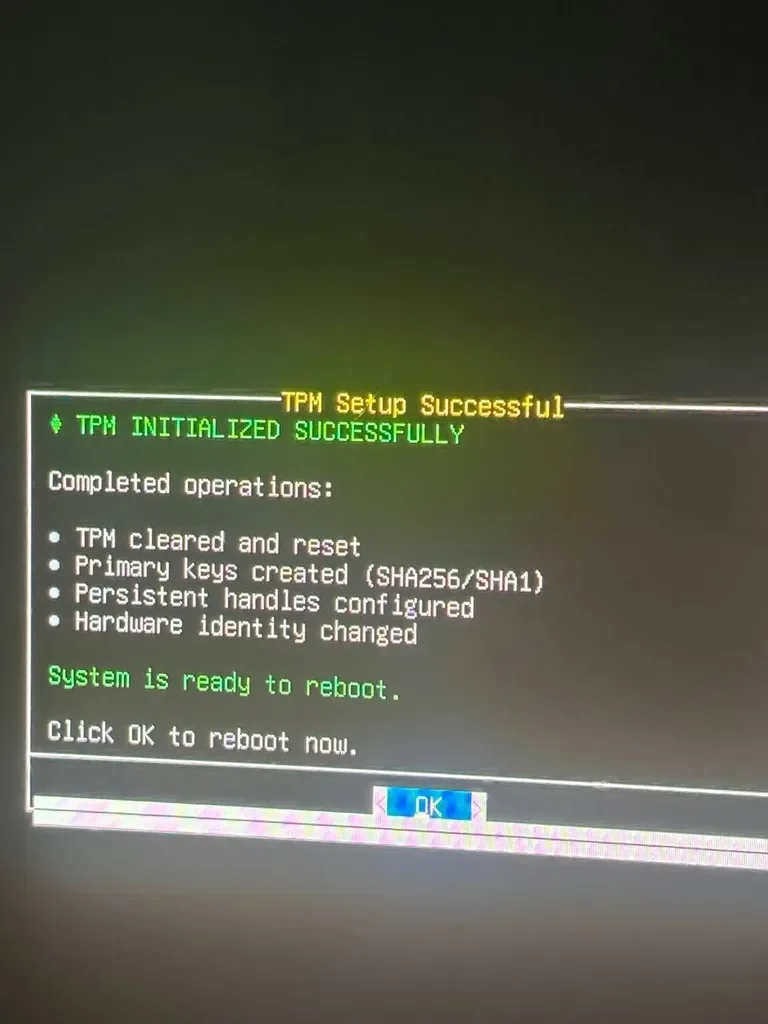
Press OK (Enter)
The system will perform a final boot.
Step 10. Completion and return to Windows
After the final boot, the final text will appear.
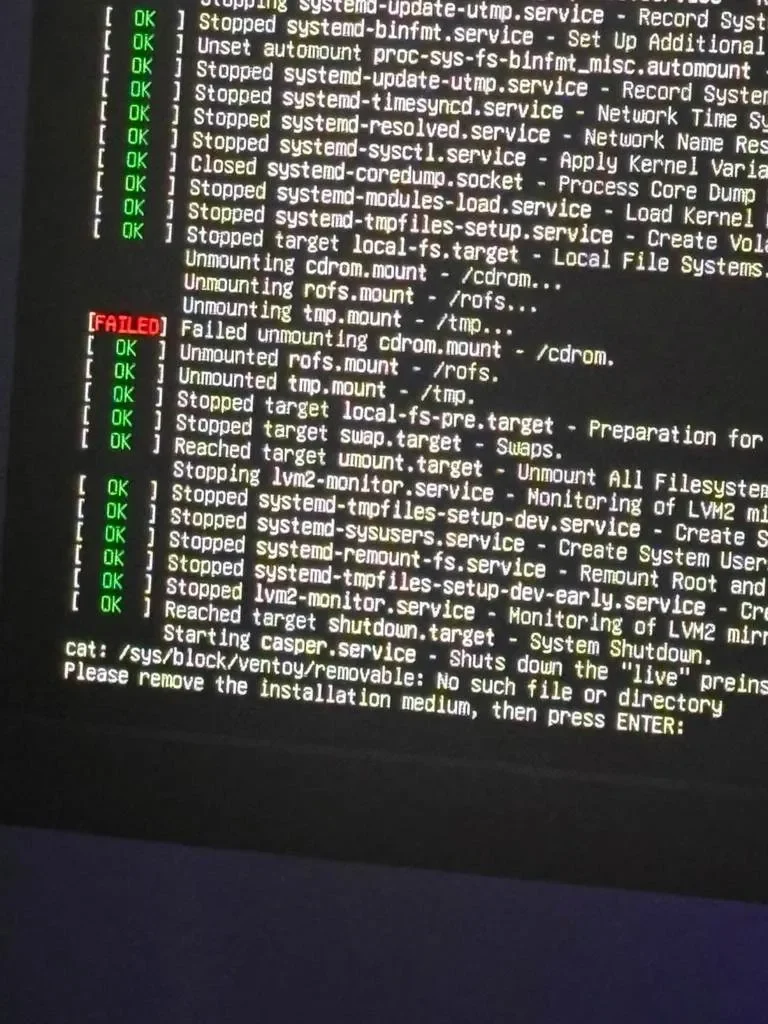
Press Enter
Wait 1–2 seconds
Remove the USB drive from the computer
After this, the system will automatically boot back into Windows.
Video guide 🎮
The video guide does not replace the text instructions. Use both formats: video — for visual reference, instructions — for accuracy and control.
System setup after spoof
Removing the network flag
Review the procedure: https://cloud.mail.ru/public/Lzd6/NCcrct4Ld
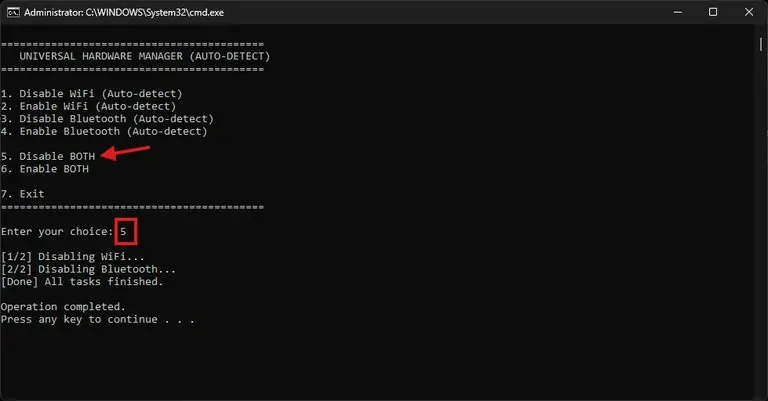
Right-click the file 1 - Disabler [Run Admin].bat → "Run as administrator".
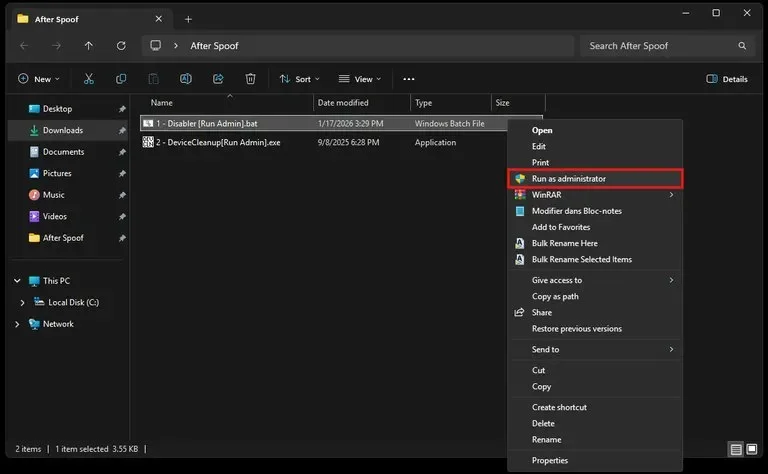
A command prompt will open. Type 5 to select "Disable BOTH (WiFi & Bluetooth)", then press Enter.
Device cleanup
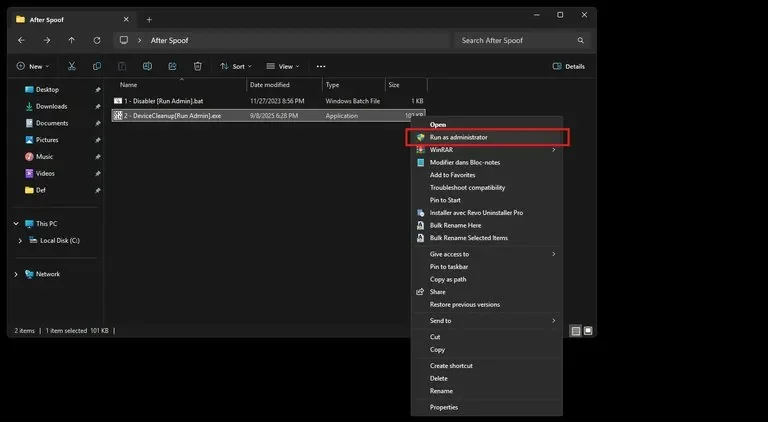
Right-click the file "2 - DeviceCleanup [Run Admin].exe" and select "Run as administrator"
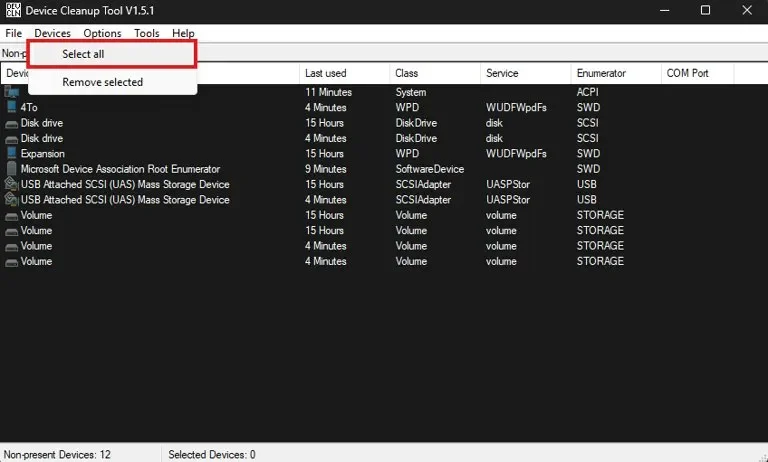
In the top menu go to the "Devices" section and click "Select all".
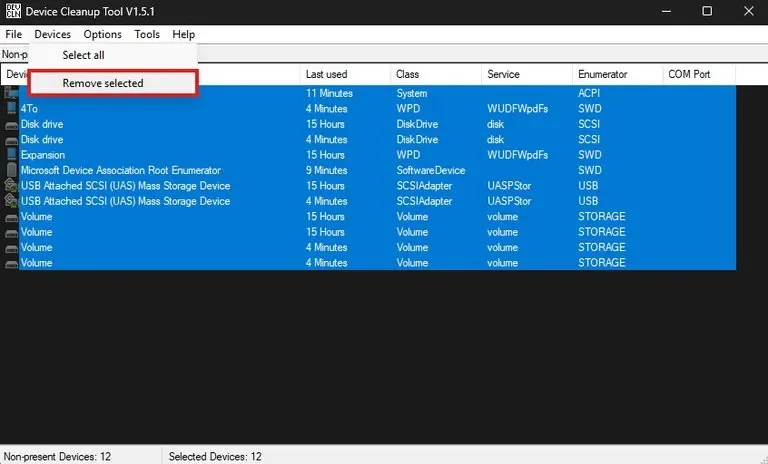
In the Devices menu again, click "Remove selected".
Verification: open "Device Manager". Your list should be cleared (hidden and disabled devices removed).
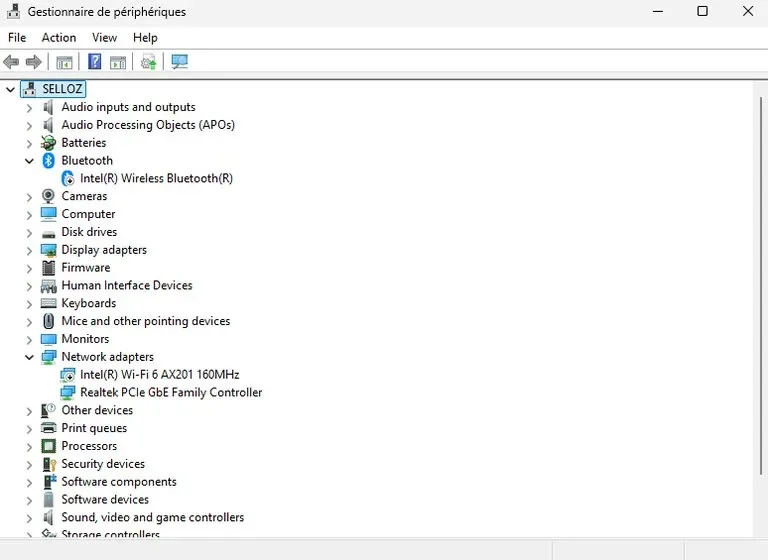
Manual action required: If Wi-Fi or WAN Miniport adapters are still showing, disable them manually (right-click → "Disable device") to avoid delays or blocking. Then repeat the device cleanup.
Install and use the applications for a full system cleanup:
https://mega.nz/file/poYWhBrZ#6l6EJMgbzNmB4ub0xwE_iaR9gkGGGYVW4s-8_p3THII
Play with a VPN for the first week after the spoof. Skipping this step = BAN.
Final check ✅
How to check if TPM is disabled
Press Win + R, type tpm.msc and press Enter.
If you see the message "Compatible TPM cannot be found" — TPM is disabled.
How to check if Secure Boot is disabled
Press Win + R, type msinfo32 and press Enter.
Find the "Secure Boot State" line:
If "Off" — everything is correct.
If "On" — it needs to be disabled in BIOS/UEFI.
Hardware ban check
Download the required games (Valorant, Fortnite, Rust, Tarkov, Apex, etc.).
Make sure Secure Boot and TPM 2.0 in BIOS are disabled.
Play a few games — in Valorant usually 1–2 unranked matches.
If you played through several matches without a ban — the hardware ban has been lifted. Spoof completed successfully!