Instructions for disabling Hyper-V (VBS)
Instructions for disabling Hyper-V (VBS)
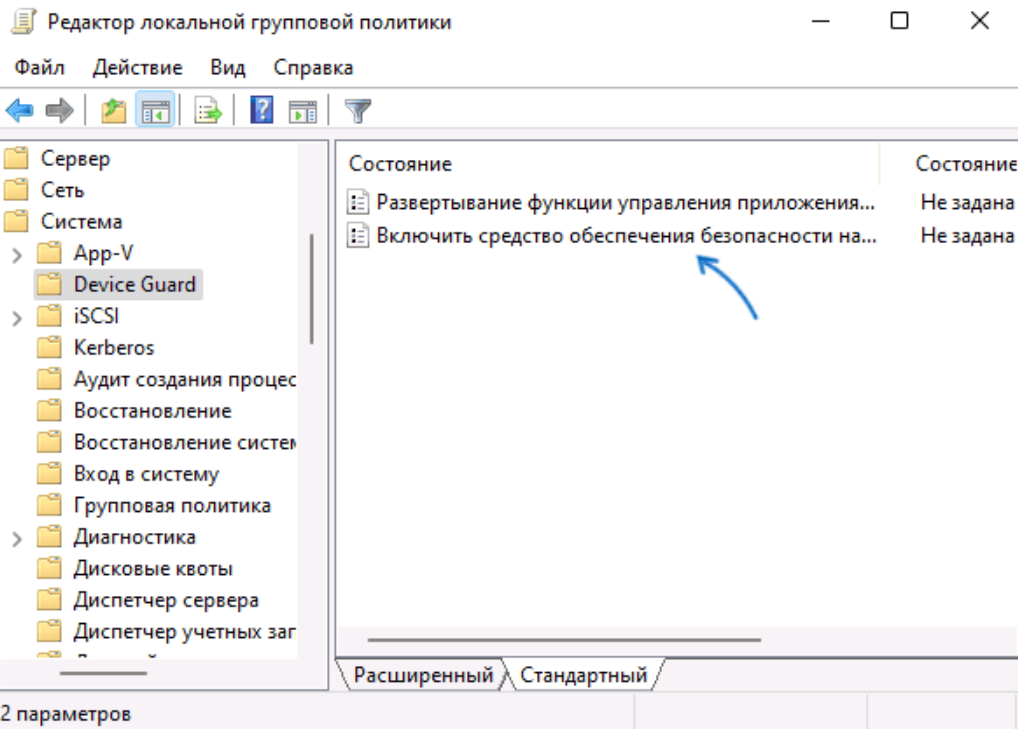
- Right-click the Start button, select Run, type gpedit.msc, and press Enter.
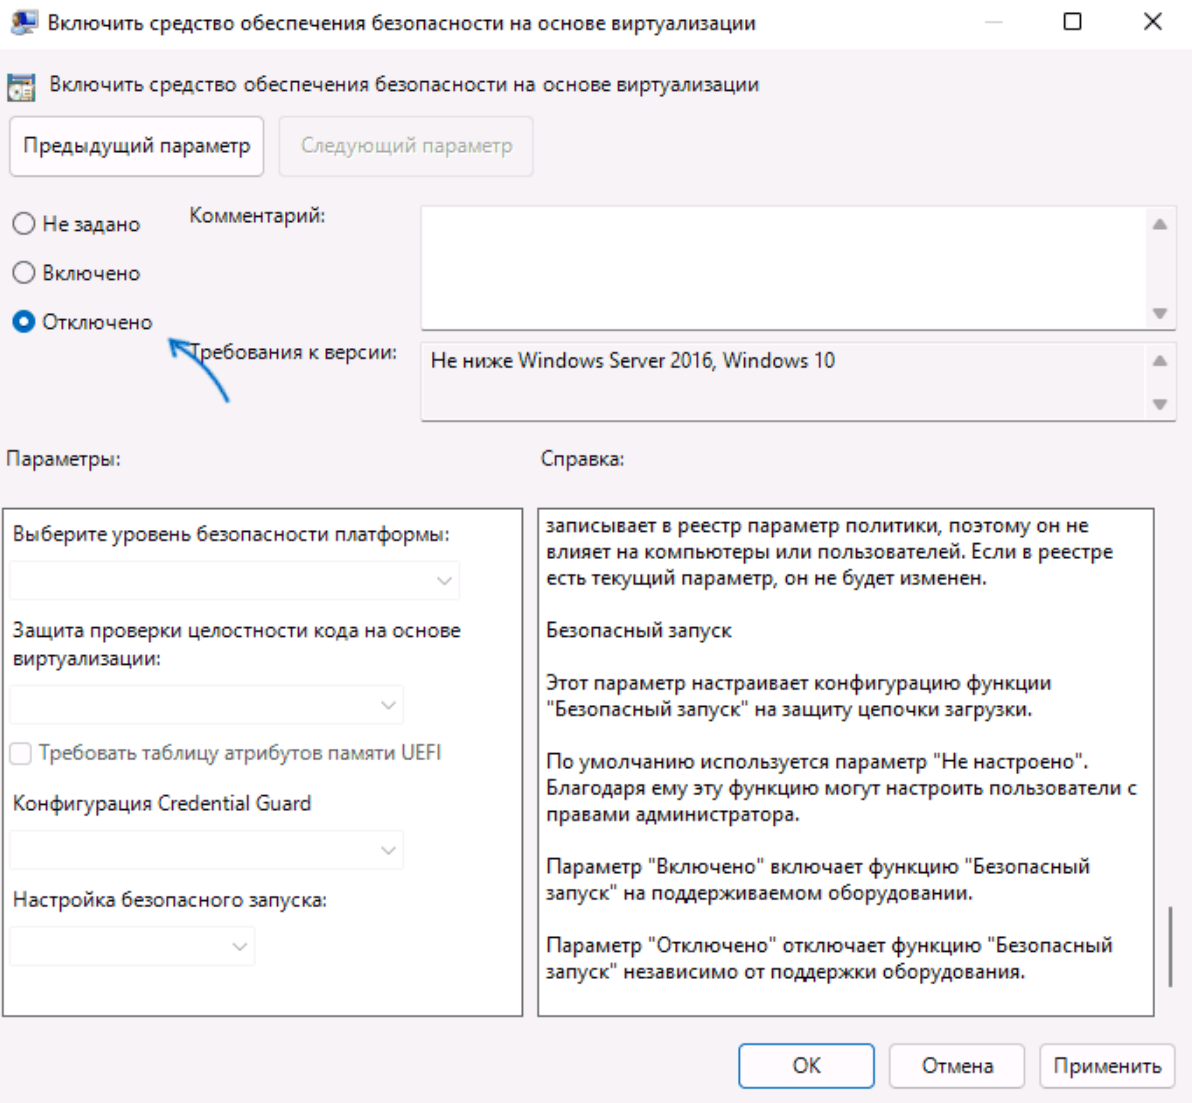
- In the Local Group Policy Editor, navigate to Computer Configuration > Administrative Templates > System > Device Guard. Double-click Turn on Virtualization-Based Security in the right panel.
- Set the setting to Disabled and apply the settings.
- Restart your PC.
If you have a Home edition of Windows installed on your computer, you can use the Registry Editor:
- Press Win + R on your keyboard, type regedit, and press Enter.
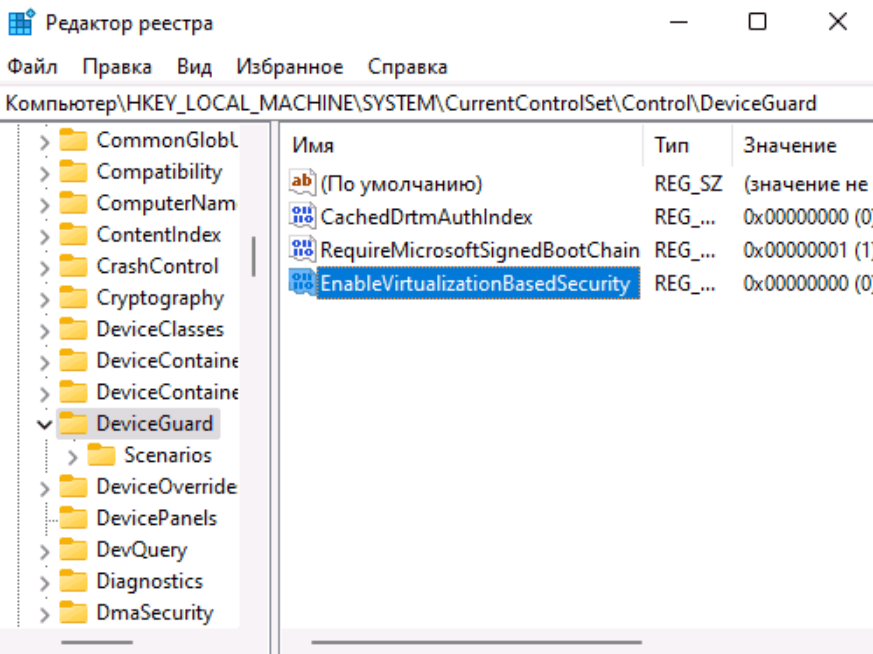
- Navigate to the registry key HKEY_LOCAL_MACHINE\System\CurrentControlSet\Control\DeviceGuard.
- Right-click in an empty area of the right pane of the Registry Editor and create a new DWORD value named EnableVirtualizationBasedSecurity and set its value to 0.
- If such a value exists, double-click it and change its value to 0.
- Restart your computer.
Additional Methods for Disabling Virtualization Based Security
If the previous solution doesn't help, and a program prompts you to disable VBS upon startup, you can use additional approaches. Please note that using these will also disable other built-in virtualization features in Windows 11 and Windows 10 (based on Hyper-V):
- Run a command prompt as administrator, type bcdedit /set hypervisorlaunchtype off , and press Enter. Then, restart your computer.
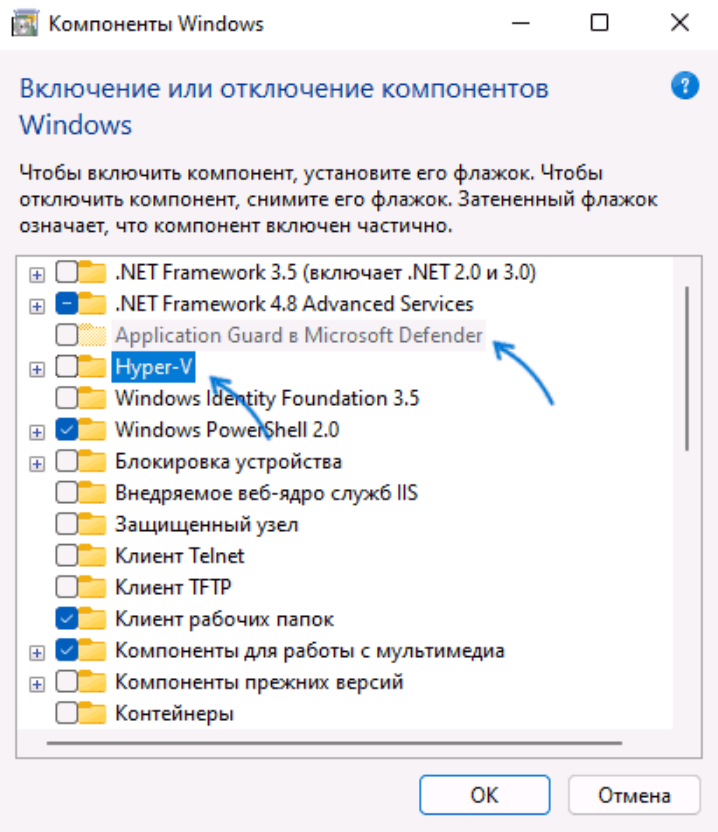
- Open Programs and Features in Control Panel or by pressing Win+R - appwiz.cpl, click "Turn Windows features on or off" on the left, disable "Microsoft Defender Application Guard," "Hyper-V," and "Virtual Machine Platform," click "OK," and restart your computer after removing the features.